Lab 4 - Database
 |
In this lab you will process a CSV file and insert a record in a Database for each line. To do this, you will use the a Bindy component to parse the CSV file, and a JPA component to insert rows in a PostgreSQL DB. |
|---|---|
- Import Lab4.zip from ~/FuseWorkshop/support/Lab4/ as an “Existing Project into Workspace”.
- Disregard the errors.
- Right-click on the Lab4 project, and select New-> JPA Entities from tables.
- Click on the “add connections”
 button.
 - Select PostgreSQL and click Next.

- Click on the “New driver definition” button
 .
. - Select PostgreSQL JDBC Driver and click on the JAR List tab.
- Select the driver file and click on the Edit JAR/Zip button.

- Browse to ~/FuseWorkshop/support/Lab4 and select postgresql-9.4-1201.jdbc4.jar
Click on the Properties tab and complete the following:
Connection URL: jdbc:postgresql://localhost:5432/JBossBank
- Database Name: JBossBank
- Password: postgres
User ID: postgres
Click OK.

- Click on the Test Connection button to validate the connection.
- Click FInish.
- In the Select Tables dialog, select the public schema and check the transactions table.

- Click Next.
- Click Next
- In the Domain java class area, enter com.jbossbank as the package.
- Click Finish.

- Open blueprint.xml by double-clicking it.
Add a File component from the Components palette.
Edit its properties
Generic - URI: file:TransactionsDir
Add an Unmarshal component from the Transformation palette.
Edit its properties
Select the bindy tab
- Class Type: com.jbossbank.Transaction
- Type: Csv

Add a Generic component from the Components palette.
Edit its properties
Uri: jpa:
Advanced-> Path
Entity Type: java.util.ArrayList
Advanced-> General
Persistence Unit: Lab4
 |
We define java.util.ArrayList as the Entity Type because we will be sending a list of transactions (read and unmarshalled from the csv file) to be inserted in the table. |
|---|---|
- Link the File component to the Unmarshal component.
- Link the Unmarshal component to the JPA component.
- Save the blueprint file (Ctrl+S).
- Open Transaction.java under src/main/java/com.jbossbank.
- Add the following annotation before “@Entity”: @CsvRecord( separator = ";" , skipFirstLine = true )
- Add the following annotation before the transactionid property: @DataField(pos = 1)
- Add the following annotation before the accountid property: @DataField(pos = 2)
- Add the following annotation before the amount property: @DataField(pos = 3)
- Add the following annotation before the clientid property: @DataField(pos = 4)

- Click on the error marker next to @CsvRecord annotation and select the first suggestion (Import CsvRecord)

- Click on the error marker next to any @DataField annotation and select the first suggestion (Import DataField).
- Save the file and close it.
- Right-click on src/main/resources/META-INF folder and select Import -> General -> File System
- Browse to ~/FuseWorkshop/support/Lab4 and select persistence.xml.
- Accept the Overwrite warning and click Yes.
Open persistence.xml file under JPA Content, and review its contents.
Run the Camel Route by right-clicking blueprint.xml, Run As -> Local Camel Context (without tests).
Once the route is running, right-click on the TransactionsDir folder.
If it doesn’t appear, just refresh Lab4 project.
Click Import, General -> File System
- Browse to ~/FuseWorkshop/support/Lab4, and select Transactions.csv
- Click Finish.
- The route will process the CSV file and insert each line into the PostgreSQL database.
- Stop the camel route by clicking on the Stop button
 .
. - Close all open files.
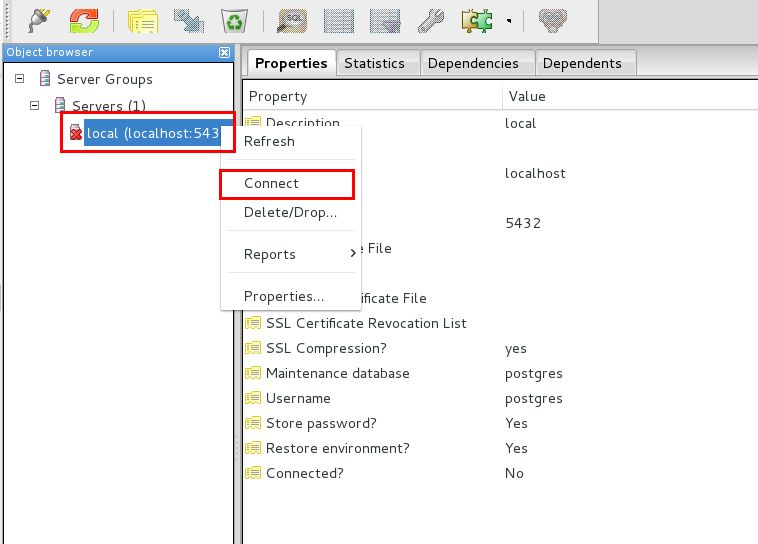
- Double-click on the pgAdmin3 icon in the desktop

- In pgAdmin III, right-click on local, and select Connect
- Expand Databases -> JBossBank -> Schemas -> public
- Right-click on Tables>transactions, select View Data>View Top 100 Rows.
- Validate that there are 3 new records in the table coming from the CSV file.
- Close pgAdmin3.